How to Design Custom Furniture with SketchUp Plans

Designing Your Dream Furniture: A SketchUp Guide

So, you've got this amazing vision for a custom piece of furniture – maybe a sleek modern bookshelf, a rustic farmhouse table, or a whimsical kids' bed. But where do you even begin? Don't worry, you don't need to be a seasoned carpenter or architect to bring your ideas to life. With SketchUp, a powerful yet user-friendly 3D modeling program, you can design your dream furniture from the comfort of your home, tweaking and perfecting until it's exactly right.

This guide will walk you through the process, from initial brainstorming to generating detailed plans you can take to a builder or even use for your own DIY project. Let's dive in!

1. Gathering Inspiration and Defining Your Needs

Before you even open SketchUp, it's crucial to have a solid understanding of what you want to create. This stage is all about brainstorming and clarifying your vision. Think about these key aspects:

1.1 Functionality: What will your furniture do?

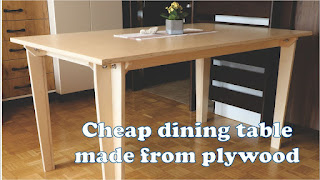
What's the purpose of your piece? Is it for storage? Seating? Display? How many people will it accommodate? What kind of items will it hold (if applicable)? Understanding the function informs the design significantly. A bookshelf needs open shelves, a coffee table needs a flat, sturdy top, and a rocking chair needs, well, rocking capabilities!

1.2 Style: What aesthetic are you aiming for?

Browse online for inspiration – Pinterest, Instagram, and even furniture websites are goldmines of ideas. Do you prefer modern minimalism, rustic charm, mid-century modern, or something else entirely? Consider the overall style of your home and how the new piece will fit in. SketchUp allows for incredible stylistic freedom, so don't be afraid to experiment!

1.3 Dimensions: How big should it be?

Measure the space where your furniture will live! This is absolutely critical. Nothing's worse than designing a gorgeous piece that simply won't fit. Note down accurate measurements of the room, any existing furniture, and the available space for your new creation. SketchUp lets you create to scale, making this process incredibly precise.

1.4 Materials: What will it be made of?

Consider the durability, cost, and aesthetic appeal of different materials. Will it be wood, metal, fabric, or a combination? Think about the specific type of wood (oak, pine, etc.) and its potential finish. These choices will influence both the design and the construction process.

2. SketchUp: Getting Started

Now for the fun part! Download and install SketchUp (there's a free version available). Don't be intimidated; the interface is surprisingly intuitive. Here's a quick overview of the process:

2.1 Creating a New Model

Open SketchUp and start a new model. You'll be presented with a blank 3D canvas. Don't worry about making mistakes; you can always undo or redo steps.

2.2 Using the Tools

SketchUp provides a variety of tools to create shapes and manipulate them. You'll primarily use tools like the Line tool, Rectangle tool, Push/Pull tool (to give shapes depth), and Move tool. Experiment with them – it's the best way to learn! There are tons of tutorials available online if you get stuck.

2.3 Working with Components

One of SketchUp's greatest strengths is its component system. Create components for recurring elements like legs, drawers, or shelves. This way, if you need to make changes, you only have to modify the component once, and all instances will update automatically. It makes the design process significantly more efficient and cleaner.

2.4 Adding Dimensions

Always add dimensions to your model. This is crucial for accuracy. Use SketchUp's built-in dimensioning tools to clearly label the length, width, and height of every part of your furniture. This ensures that your design is buildable and avoids surprises during construction.

2.5 Using Styles and Materials

SketchUp allows you to apply various materials and styles to your model, giving it a more realistic look. This is where you can experiment with different wood grains, paint colors, and metal finishes. It helps you visualize the final product much more effectively.

3. Iterating and Refining Your Design

This is where the magic happens. Don't expect to create a perfect design on your first attempt. Experiment! Try different shapes, sizes, and materials. Use SketchUp's ability to rotate and zoom to view your design from all angles. Ask yourself: Does it look good? Does it feel functional? Does it fit the space?

Iterate on your design based on your answers. SketchUp's ease of use makes this experimentation process effortless. You can easily modify dimensions, add or remove features, and change materials until you are completely satisfied with the look and functionality of your design.

4. Generating Your Plans

Once you're happy with your 3D model, it's time to generate detailed plans. SketchUp allows you to create different views of your model – top views, side views, and detailed sections. These views will serve as your blueprint for construction.

You might need to generate separate drawings for different parts of your furniture (e.g., separate drawings for the legs, the top, the drawers). Make sure the dimensions are clearly labeled on each view.

5. Taking Your Plans to the Next Step

Now you have your plans! You can use them in several ways:

  • DIY Project: If you're handy, you can build the furniture yourself. Your SketchUp plans will guide you through the process.
  • Hire a Carpenter: Provide your detailed plans to a local carpenter or furniture maker for construction.
  • 3D Printing (for smaller components): For smaller, more intricate parts, 3D printing can be a useful option.

Commonly Asked Questions

Q: Do I need any prior experience with 3D modeling?

A: No, SketchUp is designed to be user-friendly, even for beginners. There are plenty of online tutorials and resources to help you get started.

Q: Is SketchUp free?

A: Yes, there's a free version of SketchUp available, which is more than sufficient for most furniture design projects.

Q: How long does it take to design a piece of furniture in SketchUp?

A: It depends on the complexity of the design. A simple piece might take a few hours, while a more intricate one could take several days or even weeks.

Q: What if I make a mistake in SketchUp?

A: Don't worry! SketchUp makes it easy to undo or redo steps. You can also easily modify and adjust your design at any stage.

Q: Can I share my SketchUp designs with others?

A: Yes, you can export your designs in various formats (like images or 3D models) to share with carpenters, friends, or family.

Designing custom furniture with SketchUp is a rewarding experience. It allows you to bring your unique vision to life, combining creativity with precision. So, start sketching, and get ready to create something truly special!

Share:

Creative Plywood Furniture Plans for Stylish Pieces

Creative Plywood Furniture Plans for Stylish and Functional Pieces

Plywood, a versatile and readily available material, offers a unique blend of strength, affordability, and aesthetic appeal. Its layered construction allows for intricate designs and curves, making it an ideal choice for crafting stylish and functional furniture. This article explores a range of creative plywood furniture plans, providing detailed insights into design considerations, construction techniques, and finishing options to inspire your next DIY project.

Designing with Plywood: Exploring Form and Function

The inherent properties of plywood dictate design choices. Its layered structure provides exceptional strength-to-weight ratio, allowing for the creation of lightweight yet robust furniture pieces. However, the material's limitations, such as its susceptibility to moisture and the visible layering, should also be considered. Intelligent design can transform these characteristics into design elements.

Maximizing Strength and Stability

Plywood's strength lies in its layered construction. To maximize this advantage, designs should leverage the grain direction. For example, when designing chair legs or table supports, orienting the plywood layers vertically provides superior load-bearing capacity. Using thicker plywood for high-stress areas, such as the seat of a chair or the tabletop of a coffee table, further enhances stability. Consider incorporating bracing elements, such as cross-supports or corner blocks, to further reinforce structural integrity, particularly in larger pieces.

Embracing the Natural Aesthetics of Plywood

The visible layering of plywood can be a striking design feature. Instead of masking it, consider celebrating it. Opt for plywood with a visually appealing grain pattern and finish. Certain designs, such as those incorporating geometric cutouts or open shelving, can highlight the layering, creating a visually interesting contrast between solid and void spaces. The natural warmth of the wood can be enhanced with appropriate stains or sealants.

Incorporating Curves and Intricate Shapes

While plywood is traditionally associated with rectilinear designs, its flexibility allows for the creation of curved and more organic forms. Using a router with appropriate bits allows for intricate shaping and sculpting, opening up a world of design possibilities. From the graceful curves of a modern chair to the flowing lines of a bookshelf, the potential for creative expression is limitless. However, precision and careful planning are crucial when working with curves to avoid structural weaknesses.

Detailed Plywood Furniture Plans: Examples and Techniques

The following examples illustrate the diversity achievable with plywood furniture, highlighting construction techniques and design considerations.

Modern Coffee Table with Geometric Cutouts

This design features a simple rectangular top with intricate geometric cutouts along the edges. The cutouts not only add visual interest but also reduce weight and add a sense of lightness. The legs can be simple, straight supports or more elaborate, sculpted forms. Construction involves precision cutting of the top using a CNC router or a jigsaw for precise cutouts. The legs can be attached using dowels and wood glue, ensuring strong and stable joints. Finishing with a clear varnish or a natural oil highlights the plywood's grain and the intricate cutouts.

Mid-Century Modern Sideboard with Open Shelving

This design incorporates open shelving, showcasing the layering of the plywood and adding functionality. The sideboard features clean lines and simple construction, reflecting mid-century modern aesthetics. The shelves can be integrated into the side panels, creating a seamless and visually appealing design. Construction involves precise cuts and strong joinery techniques, potentially using pocket holes for added strength and a hidden joinery look. Finishing with a stain and a durable topcoat ensures longevity and protects against moisture.

Modular Shelving Unit with Customizable Configurations

This design emphasizes flexibility and customization. The shelving unit consists of individual modules that can be arranged and rearranged to suit different spaces and needs. Each module is a simple rectangular box with shelves, constructed using basic joinery techniques. The modules can be connected using dowels, screws, or even simple interlocking designs. The minimalist design allows for easy customization and adaptation to changing needs.

Choosing Plywood and Finishing Techniques

Selecting the appropriate plywood and applying the right finishing techniques significantly impacts the final product's durability and aesthetic appeal.

Plywood Selection: Grade and Thickness

The choice of plywood depends on the project's demands. For high-stress applications, like tabletops or chair seats, a higher-grade plywood with fewer imperfections is recommended. Thickness also influences strength and stability; thicker plywood provides greater load-bearing capacity. Consider the type of wood veneer as well; Birch, Baltic Birch and Maple are popular choices for their strength and aesthetic qualities.

Finishing Options: Enhancing Durability and Appearance

Finishing enhances both the appearance and durability of plywood furniture. Options include:

  • Staining: Enhances the natural wood grain and adds color depth.
  • Varnishing: Provides a protective layer, enhancing durability and resistance to moisture.
  • Oil Finishing: Penetrates the wood, providing a natural and durable finish that allows the grain to show through.
  • Painting: Offers versatility in color and design and hides imperfections.

The choice of finish depends on personal preferences and the intended use of the furniture. Proper surface preparation is crucial before applying any finish to ensure a smooth and even result.

Safety Precautions and Tools

Working with plywood requires certain safety precautions and tools. Always wear appropriate safety gear, including eye protection, dust masks, and hearing protection, especially when using power tools. Ensure the work area is well-ventilated and that all tools are used according to manufacturer's instructions. Necessary tools include a measuring tape, pencil, saw (hand saw or circular saw), clamps, sandpaper, router (optional), and appropriate safety gear.

By carefully considering design, selecting the right materials, and employing appropriate techniques, crafting stylish and functional plywood furniture becomes an achievable and rewarding endeavor. The versatility of plywood allows for a broad range of creative expression, transforming simple designs into unique and personalized pieces that reflect individual style and functionality.

Share:

Build Your Own Plywood Furniture with DIY Plans

Build Your Own Plywood Furniture with DIY Plans

Plywood, a versatile and cost-effective material, offers a wealth of possibilities for the discerning DIY enthusiast. Its layered construction provides strength and stability, making it an ideal choice for a wide range of furniture projects. This comprehensive guide delves into the process of constructing your own plywood furniture, offering detailed instructions, design considerations, and practical tips to ensure a successful outcome. From simple shelving units to more complex pieces, this guide empowers you to create custom furniture tailored to your specific needs and aesthetic preferences.

Selecting the Right Plywood

The foundation of any successful plywood furniture project lies in selecting the appropriate type and grade of plywood. Various factors influence this critical decision, including the intended use of the furniture, the desired aesthetic, and the project's complexity. Understanding these factors will significantly impact the final product's durability and appearance.

Types of Plywood

Several types of plywood exist, each possessing unique characteristics. Hardwood plywood, made from hardwood veneers, offers superior strength and a more refined aesthetic. It's ideal for furniture that will endure significant wear and tear. Softwood plywood, constructed from softwood veneers, is more affordable and readily available, making it suitable for less demanding projects. Consider the specific requirements of your project when making your selection. Birch, maple, and oak are popular hardwood choices, known for their strength, beauty, and workability. Pine and fir are common softwood options, offering a more economical alternative.

Plywood Grades

Plywood grades signify the quality of the veneers used in construction. Higher grades, such as A/A or A/B, feature smoother, more defect-free faces, making them ideal for visible surfaces. Lower grades, such as C/D, often contain imperfections and are better suited for less prominent areas or structural components. The selection of appropriate grades is crucial for achieving the desired aesthetic and structural integrity.

Thickness Considerations

The thickness of the plywood you choose will depend directly on the intended use and size of your furniture. Thicker plywood provides greater strength and stability, making it suitable for larger or heavier pieces. Thinner plywood is sufficient for smaller items or those subjected to less stress. Consider the weight the furniture will bear and the overall dimensions when determining the appropriate thickness. Standard thicknesses range from ¼ inch to 1 inch, with ½ inch being a common choice for many furniture projects.

Essential Tools and Materials

Before embarking on your plywood furniture project, ensure you have assembled the necessary tools and materials. Proper preparation is crucial for efficiency and a smooth construction process. A well-equipped workspace will greatly enhance the overall experience.

Essential Tools

  • Measuring tape
  • Pencil
  • Circular saw or jigsaw
  • Safety glasses
  • Drill with various drill bits
  • Screwdriver (both Phillips and flathead)
  • Clamps
  • Sandpaper (various grits)
  • Wood glue
  • Safety mask (for sanding and cutting)
  • Level
  • Square

Necessary Materials

  • Plywood (appropriate type, grade, and thickness)
  • Wood screws
  • Wood filler
  • Finish (paint, stain, varnish, etc.)
  • Optional: Hardware (hinges, handles, etc.)

Designing Your Plywood Furniture

Effective design is paramount to a successful furniture-making endeavor. Careful planning ensures optimal functionality, aesthetics, and structural integrity. This section outlines key considerations for designing your plywood furniture.

Functionality and Purpose

Begin by defining the specific purpose and functionality of your intended furniture. Consider the intended use and the required storage space or seating capacity. Sketching preliminary designs can help you visualize the project and refine its functionality.

Dimensions and Scale

Accurately measure the space where the furniture will be placed to ensure proper fit and scale. Consider the dimensions of similar existing furniture to gain a sense of appropriate proportions. Use graph paper or design software to create detailed drawings and plans, specifying exact dimensions for each component.

Aesthetics and Style

Consider the overall aesthetic and style of your furniture. Will it complement the existing decor? Explore various design options, considering the use of simple lines, intricate detailing, or unique joinery techniques. Research different furniture styles for inspiration.

Construction Techniques

This section details common construction techniques used in plywood furniture building. Proper technique ensures strength, durability, and a professional-looking finish.

Cutting and Shaping

Accurate cutting is fundamental to the project's success. Use a sharp saw blade to minimize splintering and ensure clean cuts. A jigsaw is ideal for intricate shapes, while a circular saw is better suited for straight cuts. Always use safety glasses and a dust mask when cutting plywood.

Joining Techniques

Several joining techniques are employed in plywood furniture construction. Butt joints are simple but require additional support, such as screws or dowels. Dado joints create a stronger, more aesthetically pleasing connection. Pocket hole joinery provides robust hidden joinery ideal for many applications. The chosen method depends on the project's complexity and strength requirements.

Assembly and Finishing

Carefully follow your plans during assembly. Use clamps to ensure accurate alignment and secure joints. Once assembled, fill any screw holes or gaps with wood filler and sand smooth. Apply the chosen finish (paint, stain, varnish, or a combination thereof) to protect the wood and enhance its appearance. Allow ample drying time between coats.

Safety Precautions

Safety should always be prioritized when working with power tools and sharp instruments. Wear appropriate safety gear, including safety glasses, a dust mask, and hearing protection, throughout the project. Ensure your workspace is well-lit and free of obstructions. Always follow the manufacturer's instructions for all tools and materials used.

Conclusion

Building your own plywood furniture offers a rewarding experience, combining creativity, craftsmanship, and cost savings. By carefully selecting materials, planning your design, and employing proper construction techniques, you can create functional and aesthetically pleasing furniture that enhances your living space. Remember to prioritize safety throughout the process and enjoy the satisfaction of transforming raw materials into beautiful, durable pieces.

Share:

Affordable and Simple Cheap Woodworking Projects for Beginners

Affordable and Simple Cheap Woodworking Projects for Beginners

Embarking on a woodworking journey needn't be an expensive endeavor. With careful planning and resourcefulness, aspiring woodworkers can create a variety of functional and aesthetically pleasing projects using readily available and inexpensive materials. This comprehensive guide outlines several beginner-friendly woodworking projects that prioritize affordability and simplicity, providing a solid foundation for future, more complex undertakings.

Essential Tools and Materials

Before commencing any woodworking project, it is crucial to acquire a basic set of tools. While advanced tools enhance efficiency, a beginner can achieve excellent results with a limited, affordable selection. The following represents a suitable starting point:

Essential Hand Tools:

  • Measuring Tape: Accurate measurements are paramount in woodworking. A reliable tape measure is indispensable.
  • Pencil: Used for marking cuts and layouts on the wood.
  • Hand Saw: A basic hand saw is sufficient for cutting smaller pieces of wood. A coping saw can also be beneficial for intricate cuts.
  • Wood Chisel: Useful for shaping and cleaning up cuts, especially when working with softer woods.
  • Hammer: Necessary for driving nails and potentially assembling projects.
  • Screwdriver (Phillips and Flathead): For securing projects using screws.
  • Safety Glasses: Essential for protecting your eyes from flying debris.
  • Work Gloves: Protect your hands from splinters and potential injuries.

Affordable Wood Sources:

Choosing the right wood is critical. For beginners, opting for readily available and less expensive softwoods like pine or fir is recommended. These woods are easier to work with and more forgiving of minor mistakes. Consider the following sources:

  • Home Improvement Stores: Often offer discounted wood scraps or smaller pieces suitable for smaller projects.
  • Reclaimed Wood: Repurposing old pallets or discarded lumber (ensure it's treated appropriately) can be a cost-effective and environmentally conscious option. Always check for nails or other hazards before use.
  • Online Classifieds/Local Auctions: These platforms may offer deals on surplus wood or even entire pallets at reduced prices.

Simple and Affordable Project Ideas

Once you've gathered your tools and materials, you can begin working on your first projects. These projects are designed to be straightforward, requiring minimal skills and tools, and utilize inexpensive materials.

1. Simple Wooden Coasters

Materials:

  • Small pieces of scrap wood (approximately 4 inches square)
  • Sandpaper (various grits)
  • Wood finish (optional)

Instructions:

Cut the wood into squares using your hand saw. Sand the edges and surfaces smooth using sandpaper, starting with coarser grits and progressing to finer grits for a smooth finish. Apply a wood finish (e.g., varnish, polyurethane) for protection and aesthetics. Allow to dry completely before use.

2. Rustic Key Holder

Materials:

  • A piece of reclaimed wood (approximately 6 inches by 12 inches)
  • Screws
  • Hooks (metal or wooden)
  • Sandpaper
  • Wood stain or paint (optional)

Instructions:

Clean and sand the reclaimed wood. Attach the hooks using screws, ensuring they are evenly spaced and securely fastened. Apply a wood stain or paint for a personalized touch. Allow to dry completely before hanging and using.

3. Basic Wooden Shelf

Materials:

  • Two pieces of wood for the shelf supports (approximately 12 inches long)
  • One piece of wood for the shelf (slightly longer than the supports)
  • Wood glue
  • Wood screws
  • Sandpaper
  • Wood finish (optional)

Instructions:

Cut the wood to the desired dimensions. Sand all surfaces smooth. Attach the shelf to the supports using wood glue and screws. Allow the glue to dry completely. Apply a wood finish for added durability and aesthetic appeal. This simple shelf can be customized to fit various spaces.

4. Wooden Picture Frame

Materials:

  • Four pieces of wood (cut to desired frame size)
  • Wood glue
  • Small nails or brads
  • Sandpaper
  • Wood stain or paint (optional)

Instructions:

Cut the wood pieces to form a square or rectangle. Assemble the frame using wood glue and small nails or brads. Ensure the corners are tight and well-joined. Sand the frame smooth and apply a wood finish. This simple frame can be used to display cherished photographs.

5. Small Wooden Box

Materials:

  • Thin pieces of wood (for the sides, top, and bottom)
  • Wood glue
  • Small nails or brads
  • Sandpaper
  • Wood stain or paint (optional)

Instructions:

Carefully cut the wood into pieces to create the sides, top, and bottom of the box. Assemble the box using wood glue and small nails or brads. Ensure all corners are tight and secure. Sand the box smooth and apply a wood finish for a polished look.

Safety Precautions

Safety should always be the paramount concern when engaging in any woodworking project. Always wear safety glasses to protect your eyes from flying debris. Use appropriate work gloves to protect your hands. Work in a well-ventilated area, especially when using finishes or stains. Follow the instructions for using any power tools carefully and always disconnect power tools before making adjustments or cleaning.

These affordable and simple woodworking projects provide an excellent starting point for beginners. Remember to prioritize safety, practice patience, and enjoy the creative process. As your skills and confidence develop, you can progress to more intricate and challenging projects, utilizing a wider range of techniques and tools.

Share:

Build Budget-Friendly Cheap Woodworking Projects for Beginners

Unlock Your Inner Carpenter: Budget-Friendly Woodworking Projects for Beginners

Hey there, future woodworkers! So you're itching to get your hands dirty with some woodworking, but the thought of fancy tools and expensive materials is giving you sticker shock? Don't worry, you're not alone! Plenty of awesome projects are totally doable on a shoestring budget. This guide is all about helping you get started with fun, easy, and cheap woodworking projects, even if your tool collection currently resembles a slightly rusty hammer.

Essential Tools – The Bare Minimum

Before we dive into projects, let's talk tools. You don't need a garage full of equipment to get going. Start with these essentials:

  • Measuring Tape: Crucial for accurate cuts. A simple 25-foot tape measure will do.
  • Pencil: For marking your wood. A regular #2 pencil is perfect.
  • Hand Saw: A good hand saw is a great investment, even if you eventually get a power saw. Practice makes perfect!
  • Screwdriver(s): Phillips and flathead are both useful. A multi-bit screwdriver is even handier.
  • Hammer: For driving nails (though screws are generally preferable for beginners).
  • Safety Glasses: Protect your eyes – this is non-negotiable!
  • Sandpaper: For smoothing rough edges. Get a variety of grits (e.g., 80, 120, 220).

That's it! Seriously. With these basic tools, you can tackle a surprising number of projects. You can always add more tools as your skills and ambition grow, but starting small is key.

Where to Find Cheap Wood

Sourcing affordable wood is half the battle. Don't automatically head to the big box stores – they can be pricey! Here are some better options:

  • Recycling Centers and Dumpsters (with permission!): Look for discarded pallets (be cautious of treated lumber!), scrap wood, or even old furniture. Always check for nails and splinters!
  • Craigslist and Facebook Marketplace: You'll find people selling wood scraps or even entire projects they're giving away for free. This is a goldmine!
  • Local Lumber Yards: While they can be more expensive than big box stores, some smaller lumber yards might have deals on scrap wood or less desirable cuts.

Remember to always check the wood for any signs of rot, insect damage, or warping before using it.

Project #1: The Simple Shelf

What you'll need:

  • Two pieces of wood for the shelf supports (approx. 12 inches long)
  • One piece of wood for the shelf (slightly longer than the supports)
  • Wood screws
  • Your basic tools (listed above)

Instructions:

  1. Measure and cut your wood to size. Don't worry about perfect precision – this is a beginner project!
  2. Position the supports on the wall where you want your shelf. Mark the screw holes.
  3. Pre-drill pilot holes (this prevents the wood from splitting) in the wall and the supports.
  4. Screw the supports to the wall. Make sure they are level!
  5. Place the shelf on top of the supports and screw it in place.
  6. Sand any rough edges and you're done!

Project #2: A Rustic Coasters Set

What you'll need:

  • Small scraps of wood (about 4 inches square)
  • Sandpaper
  • Wood stain or paint (optional)
  • Polyurethane sealant (optional)

Instructions:

  1. Cut your wood scraps into squares or circles, depending on your preference. Use a hand saw or even a jigsaw if you have one.
  2. Sand the edges and surfaces until smooth.
  3. If you want to add color, apply stain or paint. Let it dry completely.
  4. For extra protection, apply a layer of polyurethane sealant. This makes the coasters easier to clean.

Project #3: A Key Holder

What you'll need:

  • A small piece of wood (about 6 inches by 4 inches)
  • Hooks (available at most hardware stores)
  • Screws
  • Your basic tools

Instructions:

  1. Sand the wood smooth.
  2. Attach the hooks to the wood using screws. Space them evenly.
  3. Optional: Add a decorative element, like a simple design burned into the wood (if you have a wood burning tool).
  4. Mount the key holder to the wall.

Project #4: Simple Wooden Box

This one is a bit more challenging, but still manageable for beginners. You'll need to learn some basic joinery techniques (like miter cuts and butt joints). There are tons of free tutorials online that will walk you through this project.

Moving Beyond the Basics

Once you've mastered these simple projects, you can start exploring more complex techniques and projects. Consider things like:

  • Using different types of wood: Experiment with different grains and colors.
  • Adding finishes: Explore different stains, paints, and sealants to customize your projects.
  • Learning new tools: Invest in a jigsaw or a router to expand your capabilities.
  • Finding more advanced plans: Explore online resources and woodworking books for more complex projects.

Commonly Asked Questions

Q: What kind of wood should I use for beginner projects?

A: Pine is a great choice for beginners because it's relatively inexpensive, easy to work with, and readily available. You can also use plywood or other readily available scraps.

Q: Do I need a workshop?

A: Not necessarily! Many of these projects can be done in a garage, basement, or even a well-lit corner of a room. Just ensure you have good ventilation.

Q: How can I improve my woodworking skills?

A: Practice, practice, practice! Start with simple projects and gradually work your way up to more challenging ones. Watch tutorials online, read books, and don't be afraid to experiment.

Q: What if I make a mistake?

A: Don't worry! Everyone makes mistakes, even experienced woodworkers. It's all part of the learning process. Sometimes you can fix mistakes, other times it's best to start over. Learn from your errors, and keep practicing!

Happy woodworking! I hope this guide has inspired you to get started on your woodworking journey. Remember, it's all about having fun and creating something with your own two hands.

Share:

Easy Woodworking Project Plans for DIY Success

Easy Woodworking Project Plans for DIY Success

Embarking on a woodworking project can be a rewarding experience, fostering creativity and providing a tangible sense of accomplishment. This comprehensive guide outlines several easy-to-follow woodworking plans, perfect for beginners seeking to hone their skills and build functional, aesthetically pleasing pieces. We emphasize safety precautions and detailed instructions to ensure a successful and enjoyable DIY journey.

Essential Tools and Materials

Before commencing any woodworking project, it is crucial to gather the necessary tools and materials. While specific requirements vary based on the project, a basic toolkit will suffice for many beginner-friendly endeavors. Investing in quality tools is essential for precision, safety, and longevity. Compromising on tool quality often leads to frustration and potentially hazardous situations.

Essential Hand Tools:

  • Measuring Tape: Accurate measurements are paramount in woodworking. A durable, high-visibility tape measure is indispensable.
  • Pencil: A sharp pencil facilitates precise marking of cuts and assembly points.
  • Hand Saw: A fine-toothed hand saw is suitable for most cuts in softer wood types. Consider a coping saw for intricate curves.
  • Chisels: Various sizes of chisels are useful for shaping, carving, and cleaning up joints.
  • Screwdrivers (Phillips and Flathead): Essential for assembling projects that utilize screws.
  • Mallet or Hammer: Used for driving nails, chisels, and other tools.
  • Clamp(s): Clamps are crucial for holding workpieces together during assembly and gluing.
  • Safety Glasses: Eye protection is non-negotiable in all woodworking activities.
  • Work Gloves: Protecting your hands from splinters and abrasions is vital.

Essential Power Tools (Optional but Recommended):

  • Circular Saw: A circular saw greatly speeds up cutting processes and offers increased precision.
  • Drill/Driver: A cordless drill/driver is incredibly versatile for drilling pilot holes and driving screws.
  • Sanding Block/Orbital Sander: Smoothing surfaces is crucial for a professional finish. Sanding blocks are suitable for smaller projects, while orbital sanders are ideal for larger ones.

Essential Materials:

  • Wood: Selecting the appropriate wood type is critical. Pine, basswood, and poplar are beginner-friendly options due to their softness and ease of working. Ensure the wood is properly seasoned to minimize warping and cracking.
  • Wood Glue: A high-quality wood glue is necessary for strong, durable joints.
  • Wood Finish (Optional): Various finishes are available, including paints, stains, varnishes, and polyurethane, each offering different aesthetic and protective qualities.
  • Sandpaper: Various grits of sandpaper are needed for smoothing surfaces. Begin with coarser grits and progressively move to finer grits for a flawless finish.

Project 1: Simple Wooden Shelf

This project is perfect for beginners, requiring minimal tools and skills. A simple shelf provides excellent practical utility and is a great way to practice basic woodworking techniques.

Materials:

  • Two 1x12 inch boards (length according to desired shelf size)
  • Two 1x4 inch boards (length matching shelf width)
  • Wood glue
  • Wood screws
  • Sandpaper
  • Wood finish (optional)

Instructions:

  1. Cut the 1x12 inch boards to your desired length. These will form the shelf supports.
  2. Cut the 1x4 inch boards to the width of your shelf. These are the shelf itself.
  3. Sand all the boards thoroughly to remove any rough edges or splinters.
  4. Apply wood glue to the ends of the 1x4 inch boards.
  5. Attach the 1x4 inch shelf board to the 1x12 inch supports using wood screws, ensuring even spacing.
  6. Allow the glue to dry completely.
  7. Apply wood finish, if desired.

Project 2: Rustic Wooden Coasters

These charming coasters make a great beginner project, utilizing scrap wood and simple techniques. They are a perfect gift or addition to your own home decor.

Materials:

  • Scrap wood (approximately 4-inch squares)
  • Sandpaper
  • Wood finish (optional, such as varnish or polyurethane for protection)
  • Felt pads (to protect furniture surfaces)

Instructions:

  1. Cut the scrap wood into 4-inch squares.
  2. Sand the edges and surfaces of each square until smooth.
  3. Apply the chosen wood finish, following the manufacturer's instructions.
  4. Allow the finish to dry completely.
  5. Attach felt pads to the bottom of each coaster to protect surfaces.

Project 3: Simple Birdhouse

Building a birdhouse is a more challenging yet still achievable project for beginners. This project introduces more advanced techniques such as joining different pieces of wood together.

Materials:

  • Untreated wood (pine or cedar recommended)
  • Wood glue
  • Nails or screws
  • Sandpaper
  • Wood finish (optional)

Instructions:

Detailed plans for birdhouses can be easily found online, providing step-by-step instructions with diagrams. It's essential to choose a plan appropriate for your skill level. Consider focusing on simpler designs with fewer intricate cuts.

Safety Precautions

Safety should always be the paramount concern when undertaking any woodworking project. Always wear appropriate safety glasses, work gloves, and dust masks. Ensure proper ventilation in your workspace to minimize exposure to wood dust and fumes. Use clamps to secure workpieces, preventing accidental injuries. Keep your workspace clean and organized to avoid tripping hazards. Never rush through any steps, taking your time to ensure accuracy and precision.

For more complex projects, consider consulting experienced woodworkers or referring to detailed plans and tutorials available online. Practice makes perfect, and each project will enhance your skills and confidence in tackling more ambitious woodworking endeavors in the future.

Share:

DIY Working Furniture Plans for Home and Office Spaces

DIY Working Furniture Plans for Home and Office Spaces

Tired of overpriced, mass-produced furniture that lacks personality and practicality? Embrace the satisfaction of crafting your own functional and stylish pieces with these detailed DIY plans! Building your own furniture allows you to customize dimensions, materials, and design to perfectly suit your home or office space, saving you money while expressing your unique style. This guide provides comprehensive plans for several key pieces, empowering you to transform your workspace with your own two hands.

The Versatile DIY Desk

A desk forms the heart of any workspace. This plan offers a build for a sturdy, customizable desk perfect for home offices, crafting rooms, or even a dedicated gaming station. We'll walk you through choosing the right materials, from solid wood for a rustic feel to sleek, modern particleboard for a cleaner aesthetic. The design incorporates features like cable management solutions and optional drawers for added functionality. We aren't just giving you instructions; we're providing you with the tools to build a desk that genuinely works for you.

Materials You'll Need:

  • Wood: Choose your preferred type and thickness (e.g., 2x4s for the frame, plywood for the desktop).
  • Fasteners: Wood screws, pocket hole screws, wood glue.
  • Tools: Measuring tape, saw (circular saw or miter saw recommended), drill, screwdriver, clamps, sandpaper, wood finish (optional).
  • Hardware (optional): Drawer slides, drawer pulls, cable management grommets.

Step-by-Step Instructions:

We'll guide you through creating a robust frame, attaching the desktop, and adding optional features like drawers. Each step includes detailed diagrams and explanations, ensuring a smooth and successful build, even for beginners. We'll cover techniques like using pocket holes for clean, strong joints and applying a durable finish to protect your beautiful creation.

The Ergonomic DIY Chair

Comfort is paramount, especially during long work sessions. This plan focuses on building an ergonomic chair that supports proper posture and prevents back strain. We'll guide you through constructing a chair with adjustable height and lumbar support, maximizing your comfort and productivity. Forget uncomfortable, generic office chairs; build your own masterpiece of ergonomic design!

Choosing the Right Materials:

This section highlights the importance of using durable yet comfortable materials. We'll discuss suitable fabrics for upholstery, the benefits of using high-density foam for padding, and the selection of strong, supportive wood or metal for the frame. This plan emphasizes both aesthetics and functionality, resulting in a chair that's as stylish as it is supportive.

The Space-Saving DIY Shelving Unit

Maximize your vertical space and keep your workspace organized with a custom-built shelving unit. This plan offers a versatile design adaptable to various spaces and storage needs. We'll explore different shelving styles, from floating shelves for a minimalist look to more traditional, freestanding units. Learn how to precisely measure, cut, and assemble the shelves, ensuring stability and durability. This project is perfect for showcasing your favorite books, plants, or office supplies in an aesthetically pleasing and functional way.

Customization Options:

  • Size: Adjust the dimensions to perfectly fit your available space.
  • Style: Choose from various designs, including open shelving, enclosed cabinets, or a combination.
  • Materials: Experiment with different wood types, colors, and finishes to match your existing décor.

Building your own furniture is a rewarding experience. These plans provide a solid foundation, but remember to always prioritize safety and take your time. With a little effort and these comprehensive guides, you'll transform your workspace into a stylish and productive haven, one expertly crafted piece at a time.

Share:

Craft Stylish 2x4 Furniture Pieces with These Clear Instructions

Crafting Elegant Furniture from 2x4 Lumber: A Comprehensive Guide

The inherent strength and versatility of 2x4 lumber, often overlooked in favor of more "refined" materials, allow for the creation of surprisingly elegant and functional furniture pieces. This guide details the process of constructing several stylish items, emphasizing precise techniques and sophisticated design elements to elevate the aesthetic appeal of these readily available materials.

Project 1: A Modern Coffee Table

This project showcases the potential of 2x4s to create a minimalist yet striking coffee table. The clean lines and straightforward construction make it an ideal project for intermediate woodworkers.

Materials Required:

  • Four 2x4s (8ft), for the legs
  • Two 2x4s (4ft), for the shorter sides of the frame
  • Two 2x4s (5ft), for the longer sides of the frame
  • One 4ft x 4ft sheet of ¾" plywood for the tabletop
  • Wood glue
  • Wood screws (2 ½" and 1 ½")
  • Sandpaper (various grits)
  • Wood stain or paint (optional)
  • Polyurethane sealant (optional)

Construction Process:

  1. Cut the lumber to size: Precise measurements are crucial. Cut the 8ft 2x4s into four equal lengths for the legs (approximately 18 inches). Cut the remaining 2x4s according to the dimensions above for the frame. Use a miter saw for clean, 90-degree cuts. Double-check all measurements before proceeding.
  2. Assemble the frame: Using wood glue and 2 ½" screws, construct a rectangular frame using the shorter and longer 2x4s. Ensure all corners are perfectly square, using clamps to hold the pieces firmly in place during assembly. Pre-drill pilot holes to prevent wood splitting.
  3. Attach the legs: Attach the legs to the frame using wood glue and 1 ½" screws. Position the legs evenly spaced at each corner of the frame. Once again, pre-drilling pilot holes is essential.
  4. Attach the tabletop: Center the plywood tabletop on the frame and secure it using screws driven through the frame and into the plywood. Use countersinking bits to recess the screw heads for a flush finish.
  5. Sand and finish: Sand all surfaces thoroughly, starting with coarser grits and progressively moving to finer grits to achieve a smooth finish. Apply your chosen stain or paint, allowing ample drying time between coats. Finish with a polyurethane sealant for protection and enhanced durability. This layer will significantly improve the coffee table's resistance to spills and wear.

Project 2: A Sleek and Stylish Bookshelf

This bookshelf design emphasizes verticality and clean lines, creating a modern aesthetic that complements a variety of interior styles. The use of dado joints adds a touch of sophistication.

Materials Required:

  • Six 2x4s (8ft) for vertical supports and shelves
  • Four 2x4s (1ft) for horizontal supports
  • Wood glue
  • Wood screws (1 ½")
  • Dado blade for your table saw (or router and dado set)
  • Sandpaper (various grits)
  • Wood stain or paint (optional)
  • Polyurethane sealant (optional)

Construction Process:

  1. Cut the lumber to size: Cut the 8ft 2x4s into five equal lengths for the vertical supports. Use the remaining 2x4s to create the 1ft horizontal supports. Ensure precise measurements to guarantee structural integrity and aesthetic appeal. Utilizing a miter saw will greatly enhance the accuracy of these cuts.
  2. Cut dadoes: Using a dado blade on your table saw or a router with a dado set, cut dadoes (grooves) into the vertical supports to accommodate the horizontal supports (shelves). The depth of the dadoes should be slightly less than the width of the 2x4s. This will ensure a snug fit while still allowing for easy assembly.
  3. Assemble the bookshelf: Apply wood glue to the dadoes and insert the horizontal supports. Secure the joints using 1 ½" screws driven through the vertical supports into the ends of the horizontal supports. Ensure that the shelves are level and properly aligned.
  4. Sand and finish: Sand all surfaces, paying particular attention to the dado joints, to achieve a smooth finish. Apply your chosen stain or paint, allowing for adequate drying time between coats. Finish with a polyurethane sealant for protection and longevity.

Project 3: A Rustic Plant Stand

This project offers a chance to embrace the natural beauty of the wood. The slightly more rustic style complements potted plants beautifully.

Materials Required:

  • Four 2x4s (6ft) for legs and supports
  • Two 2x4s (2ft) for the top shelf
  • Wood glue
  • Wood screws (1 ½" and 2 ½")
  • Sandpaper (various grits)
  • Optional: Wood oil or varnish for a natural finish

Construction Process:

  1. Cut the lumber to size: Cut the 6ft 2x4s into four equal lengths for the legs. Cut the 2ft 2x4s to form the top shelf. Accurate measurements are essential for a stable and aesthetically pleasing plant stand.
  2. Assemble the base: Create a square base by connecting the four legs at the bottom using 2 ½" screws and wood glue. Reinforce the corners with additional bracing if needed for added stability.
  3. Attach the top shelf: Attach the 2ft 2x4s to create a shelf approximately 12 inches from the top. Position this shelf centrally. Ensure the shelf is level and secure, using both wood glue and 1 ½" screws. Pre-drilling will help to prevent wood splitting.
  4. Sand and finish: Sand all surfaces to a smooth finish. For a rustic look, consider applying a wood oil or varnish to enhance the natural grain and protect the wood. This will enhance the wood's natural beauty and provide resistance against moisture.

Remember, these are just starting points. Feel free to adjust dimensions, add extra shelves, or incorporate different finishes to create truly unique pieces that reflect your personal style. With careful planning and precise execution, 2x4 lumber can be transformed into elegant and durable furniture for your home.

Share:

DIY Period Furniture Plans for Elegant and Historic Creations

DIY Period Furniture Plans for Elegant and Historic Creations

Embrace the allure of bygone eras and craft stunning period furniture pieces with your own hands! This guide provides detailed insights into designing and building elegant, historically inspired furniture, transforming your home into a captivating reflection of your unique taste. We'll explore the intricacies of different periods, offer practical advice on sourcing materials, and equip you with the confidence to tackle ambitious DIY projects.

Choosing Your Period: A Journey Through Time

The first step in your journey is selecting a period that resonates with your aesthetic sensibilities. Each era boasts distinctive features and characteristics that define its style. Do you envision the graceful curves of Queen Anne furniture, the ornate details of Victorian pieces, or the clean lines of Shaker design? Consider the overall feel you want to achieve: the rustic charm of a farmhouse, the grandeur of a stately home, or the minimalist elegance of a modern interpretation of a classic style. Thoroughly research your chosen period. Explore books, museum websites, and online resources brimming with detailed images and historical context. This research will inform every decision you make, from wood selection to joinery techniques.

Key Period Styles to Consider:

  • Queen Anne (early 18th century): Characterized by cabriole legs, shell carving, and a sense of graceful asymmetry.
  • Georgian (mid-18th century): Known for its symmetry, refined proportions, and the use of mahogany.
  • Federal (late 18th-early 19th century): Often features neoclassical elements, including elegant lines and restrained ornamentation.
  • Victorian (mid-19th century): Renowned for its ornate details, rich materials, and a blend of various historical styles.
  • Shaker (18th-19th century): Celebrated for its simplicity, functionality, and honest craftsmanship.

Sourcing Materials and Tools: Quality Craftsmanship Begins Here

The quality of your materials directly impacts the final appearance and durability of your furniture. Opt for sustainably sourced wood whenever possible, selecting species appropriate to the period you're replicating. Mahogany, cherry, walnut, and oak were favored choices throughout history, each offering unique characteristics. Beyond the wood, you'll need various hardware components such as hinges, drawer pulls, and decorative accents, again chosen to reflect the style of your selected era. Accurate historical reproductions are often available from specialty suppliers. Assemble the necessary tools – hand tools are often favored for their precision, but power tools can increase efficiency. Ensure you have a well-equipped workspace to accommodate the size and complexity of your project.

Essential Tools and Materials:

  • Wood: Select appropriate species and grades based on your design.
  • Hand tools: Chisels, planes, saws, mallets, etc.
  • Power tools (optional): Router, planer, drill press, etc.
  • Hardware: Hinges, drawer pulls, screws, etc., reflecting your chosen period.
  • Finishes: Stains, paints, varnishes, and waxes.

Building Your Masterpiece: From Plans to Polished Perfection

Begin with detailed plans—either creating your own from historical blueprints or purchasing pre-made plans from reputable sources. Accuracy is paramount, so carefully review and understand every dimension and joinery technique before starting. Follow the plans precisely, paying close attention to detail. Each step builds upon the previous one, and precision in the early stages will prevent problems later on. Take your time, and don't hesitate to seek advice from experienced woodworkers or online forums. Celebrate each milestone—from carefully selecting the wood to applying the final finish— savoring the process of creating something beautiful and enduring. The final result will not only be a stunning piece of furniture but a testament to your skill and dedication.

Finishing Touches: Showcasing Your Creation

The final stage involves applying the appropriate finish to protect and enhance the beauty of your handcrafted furniture. Research historical finishing techniques for your chosen period. Consider whether you want a high-gloss finish or a more subdued, matte appearance. Apply several thin coats, allowing sufficient drying time between each coat, to achieve an even, protective layer. Once the finish is completely dry, carefully inspect your creation, taking pride in your accomplishment. Your finished piece of period furniture is not just a piece of furniture; it is a testament to your skills and a captivating addition to your home, transporting you and your guests to a different era.

Share:

Design a Coffee Table that Complements Your Living Room with These Plans

Crafting the Perfect Coffee Table: A Design Journey for Your Living Room

Okay, let's talk coffee tables. They're more than just a place to rest your mug (though, that's a pretty important function!). A well-chosen coffee table is the anchor of your living room, setting the tone and influencing the overall vibe. So, let's embark on a design journey together and figure out the perfect coffee table to complement your space.

Understanding Your Living Room's Style

Before we even start thinking about materials or shapes, we need to consider the existing style of your living room. Is it modern minimalist, rustic farmhouse, bohemian eclectic, traditional, mid-century modern… the list goes on! Your coffee table needs to work harmoniously with what you already have. Think about the colors, textures, and overall feel you've created. A sleek, glass-topped coffee table might look jarring in a cozy, rustic room, while a chunky, reclaimed wood table would feel out of place in a minimalist space.

Identifying Your Style Clues

To help pinpoint your living room's style, ask yourself these questions:

  • What colors dominate your room?
  • What materials are most prominent (wood, metal, fabric)?
  • Is the furniture mostly sleek and simple, or ornate and detailed?
  • What kind of lighting do you have (bright and airy, warm and dim)?
  • What is the overall feeling you want to create (calm and relaxing, energetic and vibrant)?

Once you have a clearer sense of your living room's personality, you can start narrowing down the possibilities for your coffee table.

Choosing the Right Size and Shape

Size and shape are crucial considerations. A coffee table that's too big will overwhelm the room, while one that's too small will feel insignificant. The ideal size depends on the dimensions of your living room and the size of your sofa. A good rule of thumb is to choose a coffee table that's roughly the same length as your sofa or slightly shorter. The height should allow you to comfortably rest your legs while seated on the sofa – typically, 16-18 inches is a good range.

Exploring Different Shapes

Beyond size, the shape of your coffee table can significantly impact the look and feel of your living room.

  • Rectangular coffee tables are the most common and versatile choice. They work well in most living rooms and can easily accommodate multiple people.
  • Square coffee tables offer a more compact and symmetrical look. They are great for smaller living rooms or spaces where you need to maximize floor space.
  • Round coffee tables create a softer, more inviting atmosphere. They are a good choice for rooms with a lot of traffic as there are no sharp corners to bump into.
  • Oval coffee tables offer a similar feel to round tables, but with a slightly more elongated shape. They work well in larger living rooms and can create a sense of elegance.
  • Unique shapes – Think about more unconventional shapes like hexagonal or even kidney-shaped tables to make a statement.

Selecting Materials and Finishes

The materials you choose will play a huge role in the overall aesthetic and durability of your coffee table. Consider these options:

Material Options

  • Wood: A classic choice offering warmth and versatility. Different types of wood (oak, walnut, pine) have distinct looks and levels of durability. Consider the finish – stained, painted, or natural – to match your existing décor.
  • Metal: Offers a modern and industrial feel. Steel, iron, and brass are common choices. Metal coffee tables can be sleek and minimalist or more ornate and decorative depending on the design.
  • Glass: Creates a sophisticated and airy feel, especially when combined with a metal or wood base. Glass coffee tables are great for smaller spaces as they offer a sense of openness.
  • Stone: Adds a touch of luxury and durability. Marble, granite, and slate are popular options, each offering unique veining and textures. Stone tables can be quite heavy, so consider the placement carefully.
  • Concrete: A super modern and industrial look, concrete tables can be striking focal points.

Don't forget about the details! The legs, the finish, even the hardware can significantly affect the overall look. A simple, clean design will create a more minimalist look, while intricate details can add a touch of elegance or drama.

Adding Functionality and Storage

Consider whether you need any additional features. Do you need extra storage space for remotes, magazines, or games? Some coffee tables come with drawers, shelves, or even hidden compartments.

Functionality Enhancements

  • Drawers: Ideal for storing remotes, games, or other small items.
  • Shelves: Offer additional display space for books, decorative objects, or plants.
  • Lift-top mechanisms: Allow you to raise the tabletop to create a makeshift dining area or workspace.
  • Wheels: Make it easy to move the coffee table around.

Think about how you'll actually use the coffee table. Do you need a large surface area for entertaining? Or are you looking for something more compact and minimal? Consider your lifestyle and how the coffee table will fit into your daily routine.

Frequently Asked Questions

Q: How much should I spend on a coffee table?

A: The price range for coffee tables is vast, from budget-friendly options to high-end designer pieces. Your budget will largely dictate your choices, but remember quality materials and construction generally justify a higher price point.

Q: How do I measure my living room to determine the right coffee table size?

A: Measure the length of your sofa and choose a coffee table that's roughly the same length or slightly shorter. Also, measure the distance between your sofa and any other furniture to ensure there's enough space to comfortably move around the coffee table.

Q: Can I DIY a coffee table?

A: Absolutely! There are tons of DIY coffee table projects online using reclaimed wood, pallets, or even repurposed materials. It's a great way to personalize your space and save money.

Q: How do I clean different coffee table materials?

A: Cleaning methods vary depending on the material. Wood usually requires gentle dusting and occasional wiping with a damp cloth. Glass can be cleaned with glass cleaner. Metal surfaces can be wiped with a damp cloth and mild soap. Always check the manufacturer's care instructions for specific cleaning recommendations.

Choosing the right coffee table is a fun and important part of creating a living room you love. Take your time, consider your style and needs, and have fun with the process! I hope this guide has given you a good starting point for your design journey.

Share:

BDSM Furniture Plans for Custom and Functional Builds

BDSM Furniture Plans for Custom and Functional Builds

The world of BDSM offers a vast landscape for exploration, and a significant part of that exploration involves creating a safe, comfortable, and stimulating environment. This often involves specialized furniture designed for specific purposes, moving beyond generic store-bought items. This article dives into the exciting realm of crafting custom BDSM furniture, providing you with the knowledge and inspiration to build pieces that perfectly align with your desires and needs. We'll explore design considerations, material choices, and essential safety practices to ensure your creations are both functional and safe.

Designing Your Dream BDSM Furniture

Before you even pick up a saw, careful planning is crucial. Start by identifying your specific needs and preferences. What types of activities do you envision using the furniture for? Are you looking to build a suspension system, a specialized restraint chair, a comfortable bench for extended sessions, or a multi-functional piece that incorporates various elements? Consider the overall aesthetic you desire. Do you prefer a sleek, modern look or a more rustic, handcrafted feel? Sketching out your ideas, creating mood boards, and researching existing designs can significantly streamline the process. Don't hesitate to iterate on your designs; the perfect piece often emerges through refinement and experimentation.

Understanding the Function: Form Follows Function

The function of the piece dictates its form. A suspension system, for instance, requires sturdy attachment points and durable materials capable of withstanding significant weight and stress. A restraint chair needs well-padded surfaces and secure, easily adjustable restraints. Understanding the biomechanics of the activities you intend to use the furniture for will help you design for comfort, safety, and ease of use. For instance, ensuring proper padding in pressure points will prevent discomfort and potential injury during prolonged use. Consider factors like ergonomics, adjustability, and ease of cleaning.

Choosing the Right Materials

Selecting appropriate materials is paramount for both safety and longevity. Strength, durability, and ease of cleaning are key considerations. Certain materials are better suited for particular applications than others. For example, stainless steel is excellent for its strength and hygiene, making it ideal for restraint systems. Wood, while potentially aesthetically pleasing, requires careful consideration of grain direction and strength to avoid breakage under stress. Leather and high-quality synthetic leathers are popular choices for padding and upholstery due to their durability and ease of cleaning. However, always check for any allergies or sensitivities to specific materials before using them.

Material Considerations for Specific Applications:

  • Suspension Systems: Stainless steel, aircraft-grade aluminum, or high-strength rope.
  • Restraint Chairs: Sturdy hardwood frames, padded surfaces (leather, high-density foam), and stainless steel hardware.
  • Benches and Tables: Hardwood, metal, or even concrete (depending on the desired aesthetic and functionality).

Safety First: Building Responsibly

Safety should always be the top priority when constructing BDSM furniture. Never compromise on safety for aesthetics or functionality. Use high-quality hardware and fasteners that are appropriately rated for the expected load. Ensure all sharp edges and corners are properly rounded or covered to prevent injuries. Thoroughly test the finished piece before use, applying stress and weight to ensure stability and structural integrity. Regular inspection is also vital to identify and address any potential issues before they become hazards. Consider consulting with a structural engineer or experienced furniture maker if you are unsure about any aspect of the design or construction.

Beyond the Basics: Adding Custom Touches

Once you've mastered the fundamentals, you can explore adding custom features to personalize your BDSM furniture. This could involve incorporating adjustable components, integrated lighting, specialized padding for enhanced comfort, or even incorporating elements of sound or vibration. The possibilities are virtually limitless. Remember, your custom-built furniture should reflect your individual tastes and preferences, creating a space that is both functional and aesthetically pleasing, ensuring a safe and enjoyable experience.

Share:

Affordable 2x4 Furniture Plans for Every Skill Level

Affordable 2x4 Furniture Plans for Every Skill Level

Tired of overpriced furniture that lacks personality? Ready to unleash your inner builder and create stunning pieces for your home without breaking the bank? Then grab your measuring tape and a saw – this guide dives into the world of affordable 2x4 furniture, offering plans for every skill level. We'll explore simple projects perfect for beginners, and then delve into more complex designs for experienced DIY enthusiasts. Get ready to transform your living space with functional and stylish furniture you built yourself!

Beginner-Friendly 2x4 Projects: Easy Wins for First-Timers

If you're new to woodworking, don't be intimidated! These projects use basic joinery techniques and require minimal tools. Focus on mastering the fundamentals, and you'll build confidence with each completed piece. The satisfaction of creating something functional with your own two hands is incredibly rewarding.

Simple 2x4 Bookshelf: A Perfect Starting Point

This project involves cutting 2x4s to length and using simple butt joints (joined end to end) secured with wood glue and screws. You can easily customize the height and width to fit your space. A coat of paint or stain adds a personalized touch. Materials required include 2x4s, wood glue, wood screws, a drill, a saw, and a level. Instructions are readily available online – just search for "simple 2x4 bookshelf plans." You'll find detailed step-by-step guides with diagrams.

Rustic 2x4 Coffee Table: Minimal Effort, Maximum Impact

A rustic coffee table built with 2x4s boasts a charming, farmhouse aesthetic. Similar to the bookshelf, this project utilizes basic cuts and simple joinery. Consider adding casters for easy mobility. Enhance the look by leaving the wood natural or applying a distressed paint finish. This project teaches you about creating a stable base and attaching a tabletop, laying the groundwork for more complex furniture projects. Look for free plans online; many tutorials include videos for visual learners.

Intermediate Projects: Level Up Your DIY Skills

Once you've mastered the basics, it's time to tackle projects involving more intricate techniques. These designs introduce slightly more challenging joinery and construction methods, but the results are well worth the effort. You'll gain valuable experience and expand your woodworking repertoire.

2x4 Headboard: Add Character to Your Bedroom

Create a stunning headboard that elevates your bedroom's style. This project uses more complex cuts and might incorporate techniques like pocket holes for a cleaner look. Plan your design carefully, considering the size and shape you want. You can easily incorporate vertical or horizontal planks for different visual effects. This project involves accurate measuring and cutting, testing your precision. Search online for "2x4 headboard plans" to find tutorials.

Modern 2x4 Side Table: A Touch of Elegance

This project showcases your growing skills by incorporating more sophisticated joinery methods and potentially the use of additional materials like plywood for shelving. You'll learn to create clean lines and build a sturdy, yet elegant piece. Consider using dado joints (slots cut into a piece of wood to receive a matching piece) for increased strength and a professional finish. This project requires precise measurements and a keen eye for detail.

Advanced 2x4 Projects: For Experienced Woodworkers

For seasoned DIY enthusiasts, these challenging projects allow you to experiment with more complex designs and joinery techniques. You can push your creativity to the limit and build truly unique furniture pieces.

Customizable 2x4 Desk: A Statement Piece for Your Home Office

A custom-built desk offers unmatched flexibility, allowing you to create a workspace perfectly tailored to your needs. This involves careful planning, detailed cuts, and potentially the incorporation of other materials like a sturdy desktop surface (plywood or reclaimed wood). Advanced joinery like mortise and tenon joints can elevate this project to a professional level. Expect to spend significant time on planning and execution. Detailed plans are typically found in woodworking magazines or on specialized websites.

Multi-Functional 2x4 Shelving Unit: Organization and Style Combined

This project combines woodworking skills with organizational design, creating a beautiful and practical storage solution. It involves a complex framework, and requires accurate measurements and cuts. You'll need strong joinery to ensure the shelving unit remains stable and durable. Consider using various woodworking techniques to achieve a truly stunning piece. This project presents a challenge for your skills and imagination.

Remember to always prioritize safety when working with power tools. Wear appropriate safety gear, and take your time – accuracy is key to a successful project. With patience and practice, you'll build beautiful, affordable 2x4 furniture that you'll be proud to display in your home.

Share:

Free Woodworking Projects for Easy DIY Furniture Builds

Unleash Your Inner Craftsperson: Simple Woodworking Projects for Stunning DIY Furniture

Tired of mass-produced furniture? Yearning to create something beautiful and functional with your own two hands? Then dive into the rewarding world of woodworking! This article presents several easy DIY furniture projects perfect for beginners, requiring minimal tools and experience. Prepare to transform basic lumber into stylish pieces that will enhance your home and boost your confidence. Forget expensive, impersonal store-bought pieces; let's build something truly unique and personal.

A Rustic Charm: The Simple Bookshelf

Start your woodworking journey with a project that's both practical and aesthetically pleasing: a rustic bookshelf. This project utilizes basic cuts and requires minimal joinery, making it ideal for novices. You'll primarily need untreated pine boards, wood glue, screws, and a simple saw (a circular saw or hand saw will work fine). Choose attractive, slightly uneven boards for a more rustic feel. Remember to sand all surfaces smooth before assembling. Consider adding a protective stain or sealant to enhance the wood's natural beauty and durability. The entire process, from cutting to finishing, can be completed within a weekend, leaving you with a charming bookshelf ready to showcase your favorite reads.

Step-by-Step Guide:

  1. Cut the boards to your desired dimensions for shelves and sides. Remember to account for the thickness of the boards when determining shelf spacing.
  2. Apply wood glue to the ends of the shelf boards and attach them to the side pieces using screws, ensuring even spacing.
  3. Sand all surfaces thoroughly, paying attention to any rough edges or splinters.
  4. Apply a stain or sealant of your choice. Allow sufficient drying time before use.

Modern Minimalism: A Sleek Floating Shelf

For a more contemporary touch, create a sleek floating shelf. This project showcases clean lines and minimal hardware. You'll need high-quality plywood, strong wood screws, and sturdy L-brackets hidden behind the shelf. Precise measurements are crucial for this project to maintain its modern aesthetic. Before installation, carefully plan the placement to ensure it's securely mounted to a wall stud. Once installed, the floating shelf will appear to effortlessly float against your wall, providing a sophisticated storage solution.

Essential Tips:

  • Use a level to ensure the shelf is perfectly horizontal.
  • Pre-drill pilot holes to prevent splitting the wood when screwing in the brackets.
  • Consider adding a subtle edge banding to the shelf's front for a polished finish.

Rustic Industrial Style: A Simple Coffee Table

Embrace the industrial aesthetic with a simple coffee table built from reclaimed wood or repurposed pallets. This project involves slightly more complex joinery, but it remains achievable for beginners. Safety is paramount – always wear safety glasses and use appropriate tools. You'll need to carefully disassemble the pallet (if using one) and thoroughly clean the wood. Consider using metal hairpin legs for a distinctly industrial touch. Once assembled, the rustic coffee table will add a unique, character-filled centerpiece to your living room.

Choosing Your Materials:

  • If using pallets, ensure they are properly treated and free from harmful chemicals or pests.
  • Sand the wood thoroughly to remove any splinters or uneven surfaces.
  • Use strong wood glue and screws to create a robust and stable table.

These are just three starting points. With a little creativity and some basic woodworking skills, you can transform simple materials into stunning, personalized furniture. So, gather your tools, choose your project, and unleash your inner craftsman!

Share:

Smart Woodworking Plans for Tool Storage Solutions

Smart Woodworking Plans for Tool Storage Solutions

Tired of cluttered workshops and endlessly searching for that one specific tool? Effective tool storage isn't just about tidiness; it's about boosting your efficiency and safety. This article provides smart woodworking plans to transform your workspace from chaotic to organized, empowering you to reclaim your workshop and maximize your productivity. We'll explore various designs, from simple to complex, ensuring you find the perfect solution for your needs and skill level. Get ready to build the ultimate tool storage system!

Wall-Mounted Tool Storage: Maximizing Vertical Space

Wall-mounted storage offers a fantastic way to reclaim valuable floor space in your workshop. Instead of tools cluttering benches and floors, they'll be readily accessible and neatly organized. Consider these options:

French Cleat System: The Versatile Choice

A French cleat system provides unparalleled flexibility and adaptability. This ingenious system utilizes angled cleats mounted to both the wall and the backs of your tool organizers. The angled design allows for easy insertion and removal of tools and storage units. Build your cleats from sturdy hardwood like maple or oak for long-lasting durability. You can customize the size and number of cleats to perfectly fit your workshop's dimensions and tool collection. This system allows for easy rearrangement and addition of new storage components as your needs evolve.

Floating Shelves with Tool Racks: A Classic Approach

Simple floating shelves are a classic and effective solution. Enhance them by adding integrated tool racks or hooks beneath the shelves. This design keeps tools organized and within easy reach. Choose shelves made from thick, robust lumber to prevent sagging under the weight of heavier tools. Consider adding a finish, such as a durable varnish or polyurethane, to protect the wood from moisture and wear.

Mobile Tool Cabinets: Portability and Organization

For larger workshops or those who frequently move tools between work areas, mobile tool cabinets offer both organization and portability. These cabinets provide a secure and organized solution for storing hand tools, power tools, and other workshop essentials.

Rolling Cabinet with Drawers and Shelves: A Customizable Solution

Design a rolling cabinet with a combination of drawers and shelves to accommodate different types of tools. Use high-quality drawer slides for smooth operation and durability. Shelves offer versatile storage for larger items, while drawers provide a safe place for smaller tools and accessories. Remember to incorporate sturdy casters to ensure easy mobility.

Specialized Tool Carriers: Tailored to Your Needs

For specific tool sets, consider building dedicated carriers. A router table carrier, for instance, can hold your router, bits, and other accessories neatly together. This prevents the frustration of searching for individual components. Design these carriers with handles for easy transportation.

Advanced Tool Storage: Beyond the Basics

For serious woodworkers, advanced storage solutions offer maximum organization and efficiency. These designs often require more advanced woodworking skills but provide significant rewards.

Outfeed Table with Built-in Storage: Efficiency and Safety

Combine an outfeed table with integrated storage for tools and materials used during specific woodworking projects. This consolidates related equipment, increasing your workflow efficiency and reducing setup time. Incorporate safety features such as a dust collection system to maintain a clean work environment.

Customizable Pegboard System: Ultimate Flexibility

A well-designed pegboard system offers the ultimate in flexibility and customization. You can adapt it to hold any type of tool, simply by choosing the appropriate pegs and hooks. Choose a durable pegboard material that can withstand daily use. Consider painting the pegboard for a more finished look.

By implementing these smart woodworking plans, you transform your workshop from a frustrating space into a highly efficient and enjoyable workspace. Remember to prioritize safety, durability, and ease of use when designing and constructing your tool storage solutions. Happy building!

Share:

Best Portable Woodworking Tables for Small Workshops

Best Portable Woodworking Tables for Small Workshops

Cramped quarters shouldn't cramp your woodworking style! A small workshop doesn't mean sacrificing functionality. The key is choosing the right portable workbench. This article explores the best portable woodworking tables designed for maximizing space and minimizing compromise in small workshops, focusing on features that matter most to serious woodworkers working with limited space.

Key Features to Consider

Before diving into specific models, let's pinpoint the essential features to look for in a portable woodworking table tailored for small spaces. Consider these factors carefully to find the perfect fit for your needs and available footprint. A seemingly minor detail can significantly impact your workflow and overall satisfaction. Don't underestimate the importance of thoughtful selection!

Size and Portability

Obviously, size reigns supreme in a small workshop. Measure your available space meticulously before purchasing. Look for tables that fold flat for easy storage, feature lightweight yet durable construction (often employing aluminum or high-quality folding mechanisms), and boast manageable weight for easy transport. Some even offer wheels for effortless mobility between work areas. Remember, "portable" means more than just small – it means easily moved and stored when not in use.

Work Surface Area and Stability

While compactness is key, you still need adequate working space. A smaller footprint doesn't necessarily mean a cramped working surface. Some cleverly designed tables maximize usable area. Look for sturdy construction with robust legs and bracing to prevent wobbling, especially when using power tools. A stable work surface ensures accuracy and safety – crucial elements in any woodworking project.

Durability and Material

Invest in a portable workbench built to withstand the rigors of woodworking. Choose materials that resist dents, scratches, and the usual wear and tear of projects involving heavy tools. Consider work surfaces made from durable materials like plywood, MDF, or even high-pressure laminate (HPL). Sturdy metal legs or frames are essential for providing a rock-solid platform.

Additional Features

Consider features that enhance functionality and convenience. These can include:

  • Integrated clamping systems
  • Built-in storage for tools and supplies
  • Adjustable height options
  • Pre-drilled holes for vises or other accessories
These extras can significantly boost efficiency and organization within a limited space.

Top Picks for Small Workshops

Now, let's explore some excellent portable woodworking tables ideal for small workshops. We've selected models based on the aforementioned criteria, highlighting what sets each one apart.

[Insert Model Name and Manufacturer Here]

Highlight key features: Size, weight, material, unique selling points, and price point. Mention any pros and cons. For example, "The [Model Name] boasts a surprisingly spacious work surface despite its compact folded size. Its lightweight aluminum frame makes moving it a breeze, while the durable HPL top resists scratches. However, the integrated clamps might feel a little weak for very large projects."

[Insert Model Name and Manufacturer Here]

Highlight key features: Size, weight, material, unique selling points, and price point. Mention any pros and cons. For example, "The [Model Name] is a budget-friendly option that doesn't compromise on sturdiness. Its folding design and robust steel legs make it perfect for small spaces. However, the lack of integrated storage might require you to supplement with additional storage solutions."

[Insert Model Name and Manufacturer Here]

Highlight key features: Size, weight, material, unique selling points, and price point. Mention any pros and cons. For example, "The [Model Name] excels in versatility. Its adjustable height and multiple configurations make it adaptable for various tasks, even outside the workshop. However, this versatility comes at the cost of slightly higher price and perhaps more complex assembly."

Conclusion

Choosing the right portable woodworking table can transform your small workshop from a cramped space into an efficient and enjoyable workspace. By carefully considering size, stability, durability, and additional features, you can find the perfect solution to maximize your space and minimize frustration. Remember to always prioritize safety and invest in a quality table that will last for years of woodworking projects.

Share: